Run your first eval
Create a prompt, build a dataset, run an experiment, and iterate.
The eval workflow has four parts: a prompt or model you want to test, a dataset (the test inputs), an evaluator (how to score the outputs), and an experiment (which runs everything together). You create a prompt, fill a dataset with test cases, define how outputs should be scored, and run the experiment. Then update your prompt, run again, and compare results until you are happy with the quality.
In the example below, we will walk through the prompt workflow: how to create a prompt, evaluate it, and iterate to improve quality.
Go to the Prompts page and create a new prompt template. Add variables using {{variable_name}} syntax so they can be tested with different inputs.
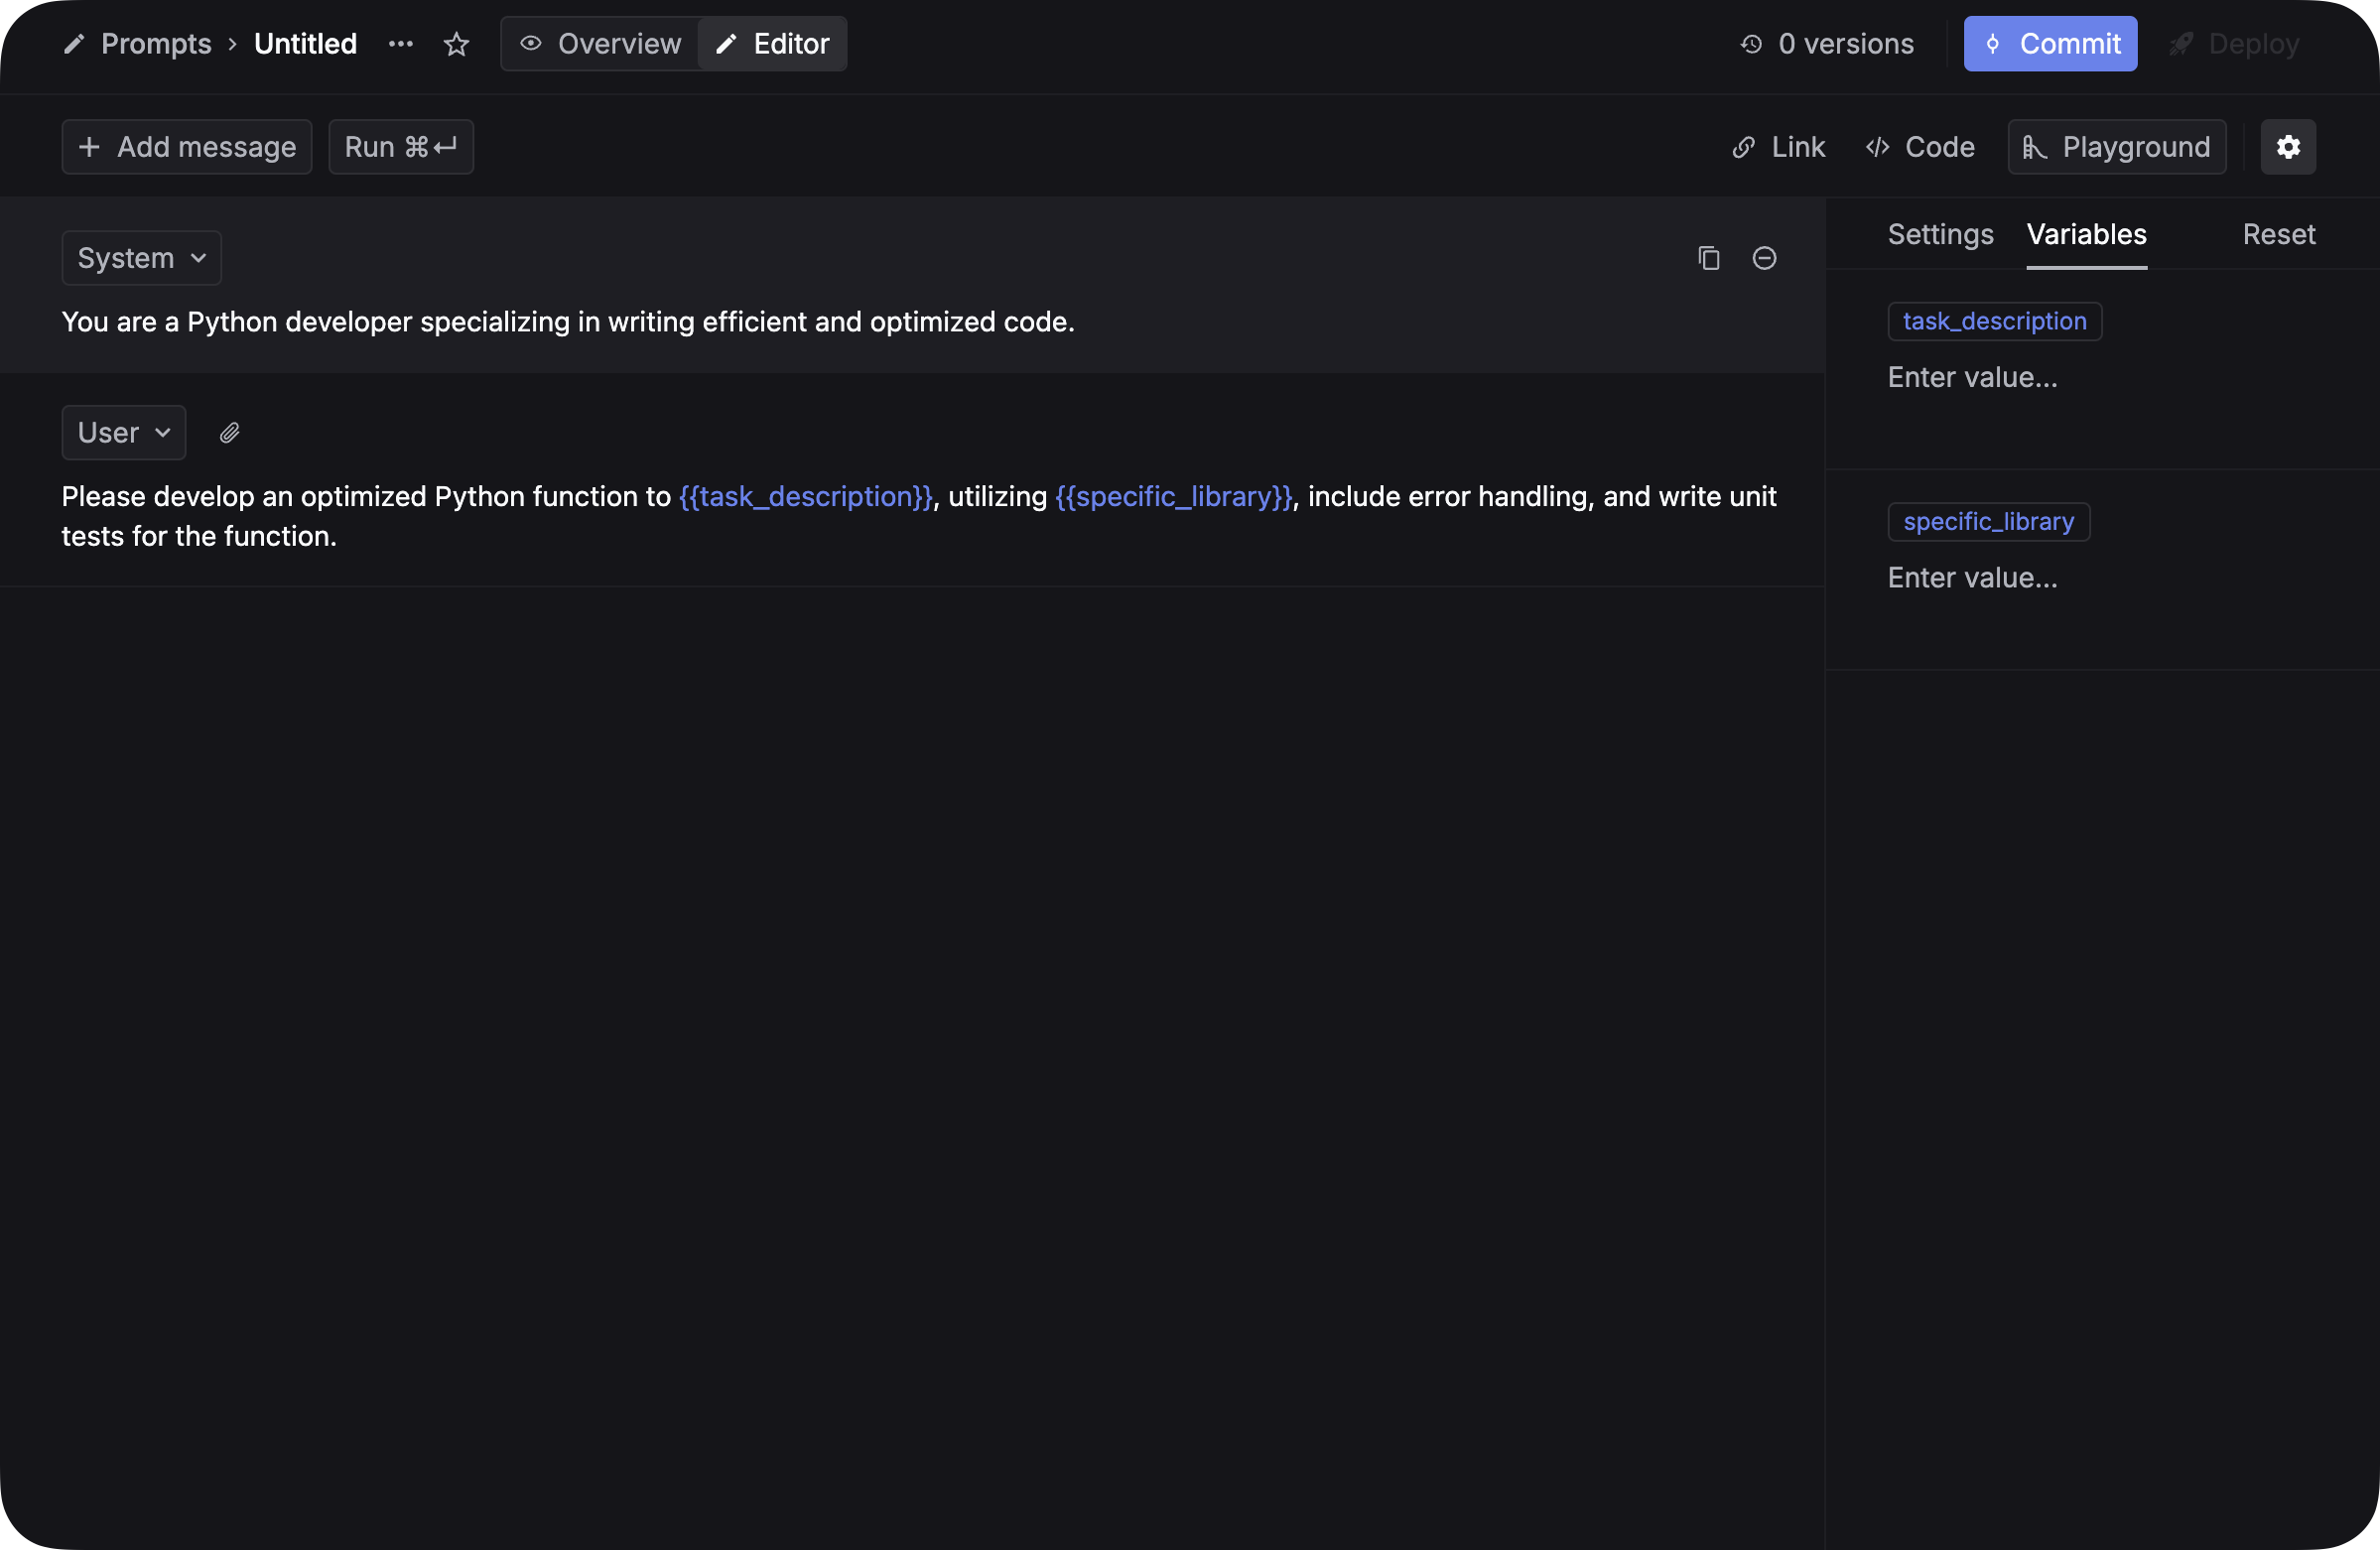
Commit your first version. You will create a second version later to compare results.
See Prompt management for more details on creating and managing prompts.
Datasets provide the test inputs for your experiments. You can build one from production data or from scratch.
Create a CSV file with columns matching your prompt variables (without the {{}} syntax) and an optional ideal_output column. Go to Datasets, click Create dataset, and choose Insert from CSV. Map the CSV fields to dataset fields and import.
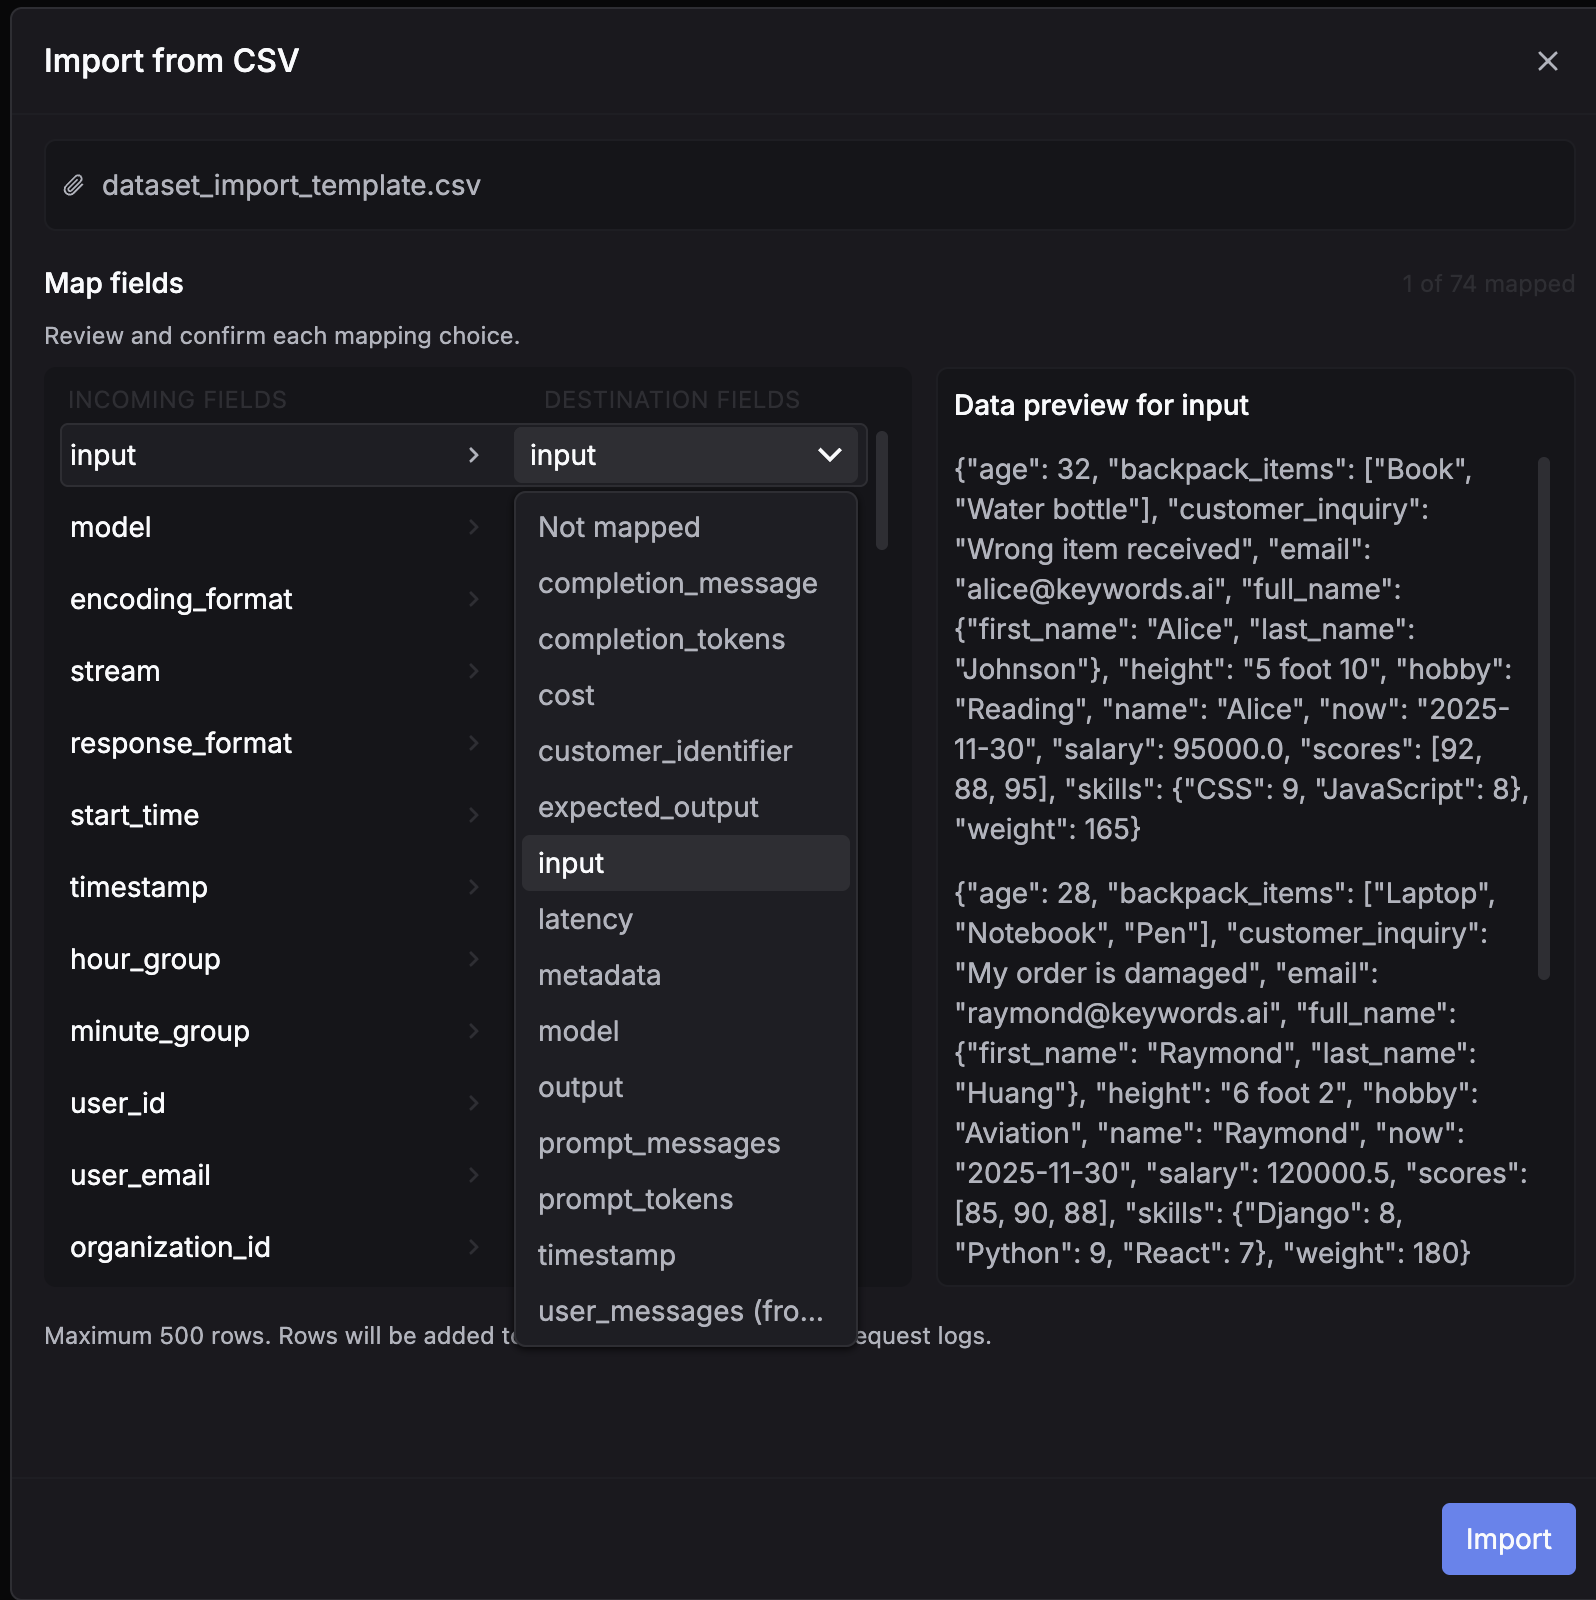
Download the CSV template to get started.
Go to Evaluators and click + New evaluator.
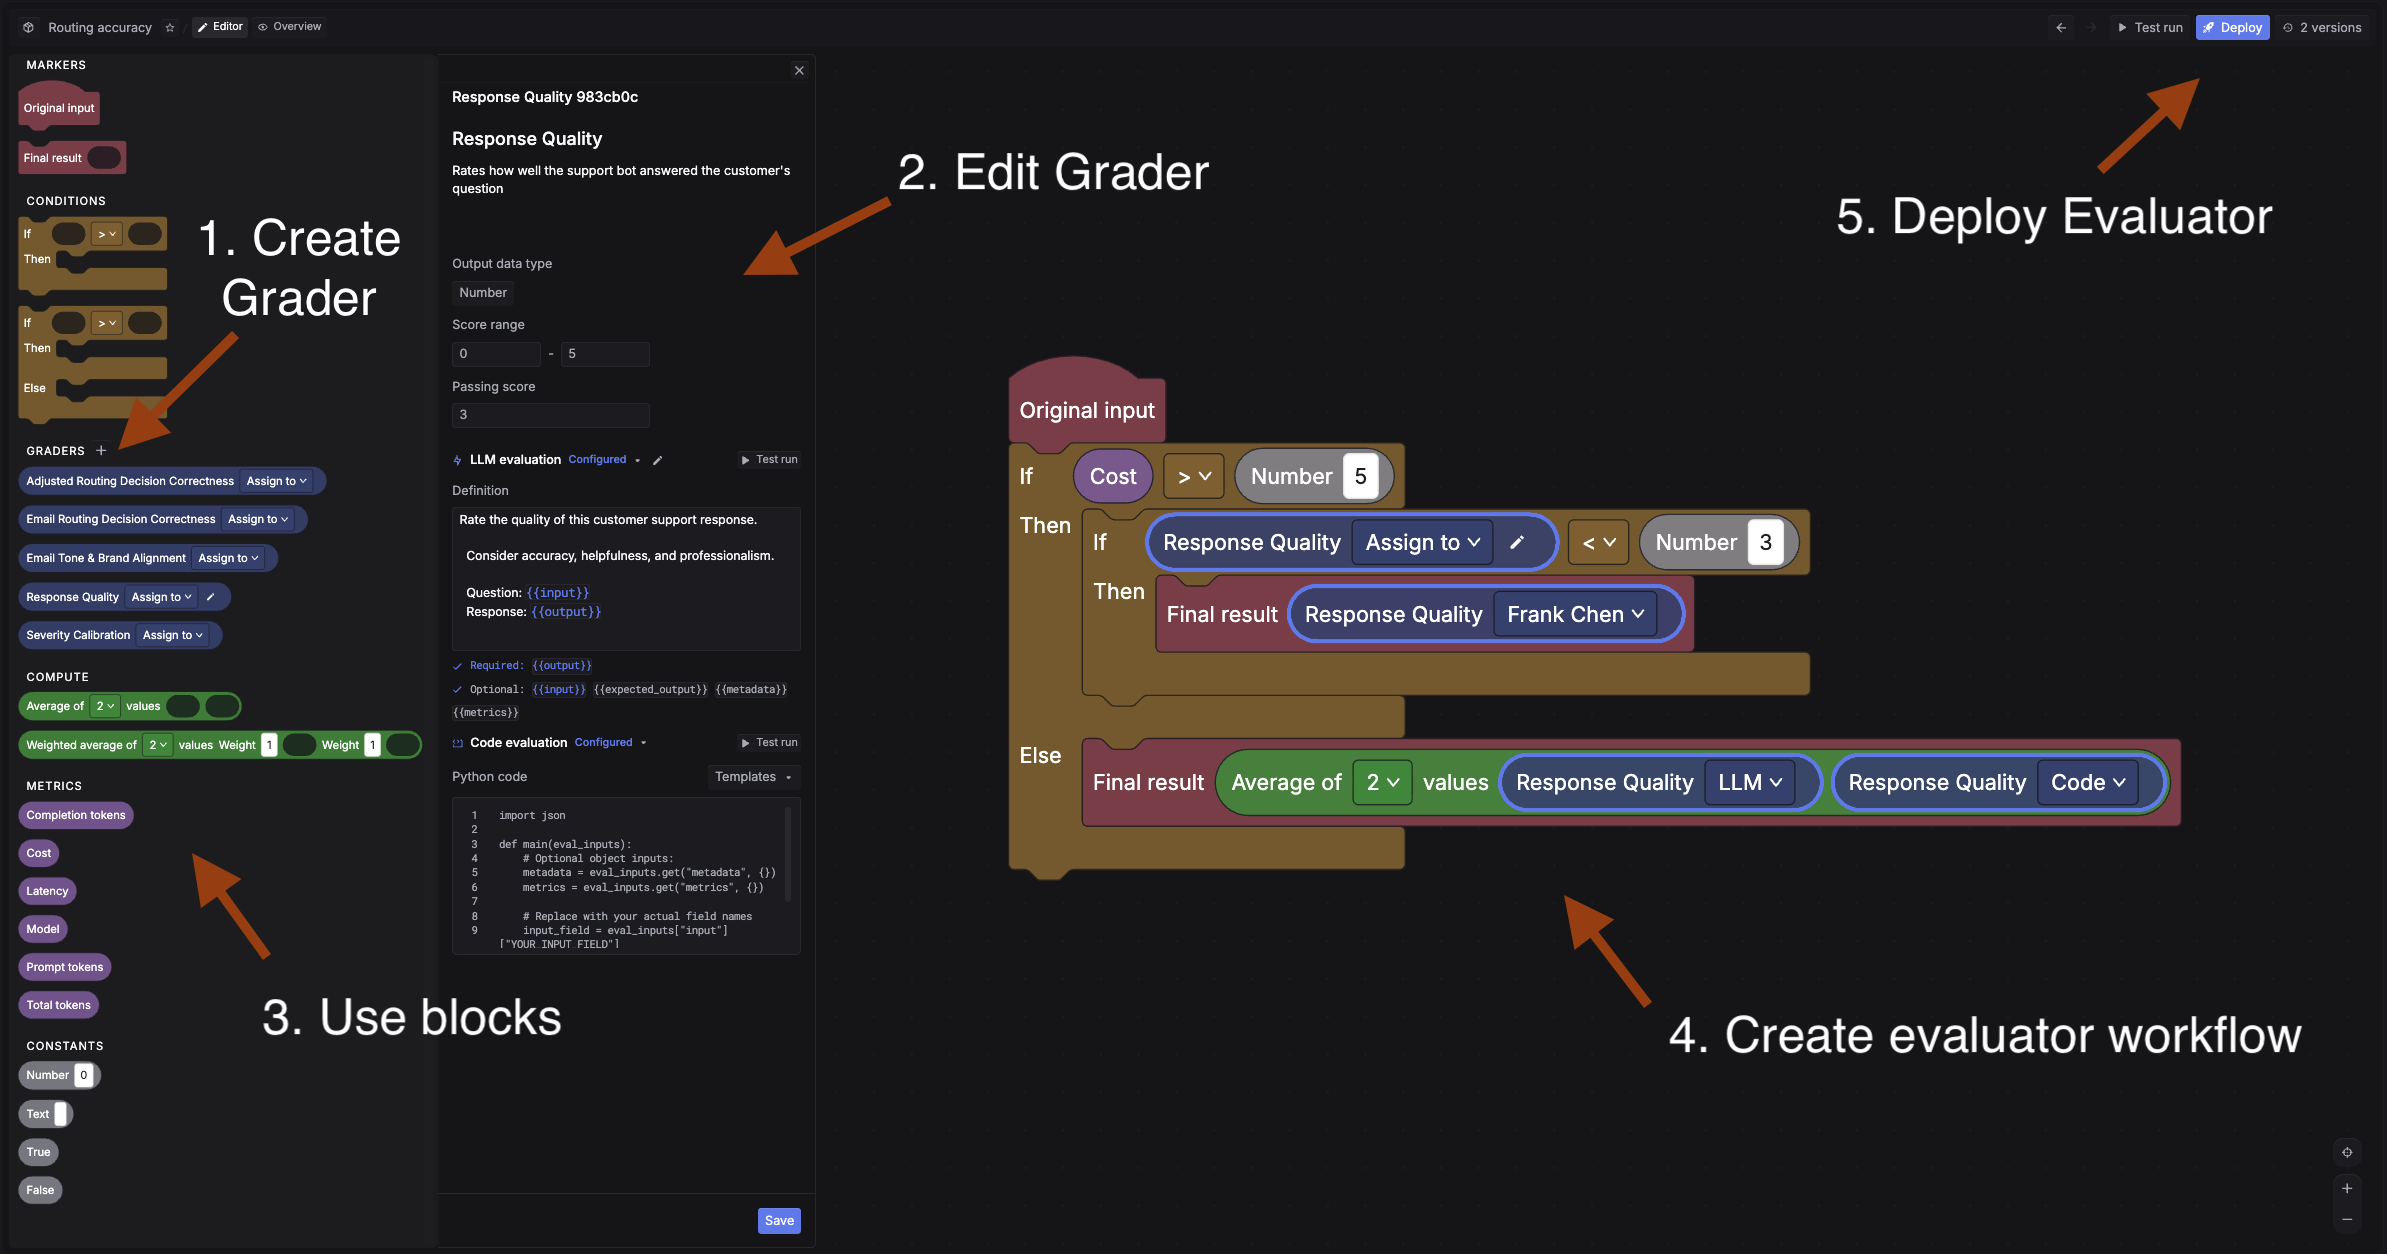
First, create a grader. A grader is the scoring unit. For this quickstart, create an LLM grader:
{{output}} and can reference {{input}} and {{expected_output}}Then build the evaluator workflow. An evaluator chains graders together using a visual block builder. For example, you could run an LLM grader first, then add a condition: if the score is below 3, route to a human grader for manual review. This lets you automate most scoring while catching edge cases with human judgment.
For a simple setup, just connect: Original input -> your LLM grader -> Final result. You can always add more graders and conditions later.
Deploy the evaluator when ready.
See Evaluators for code graders, human graders, and the full block builder reference.
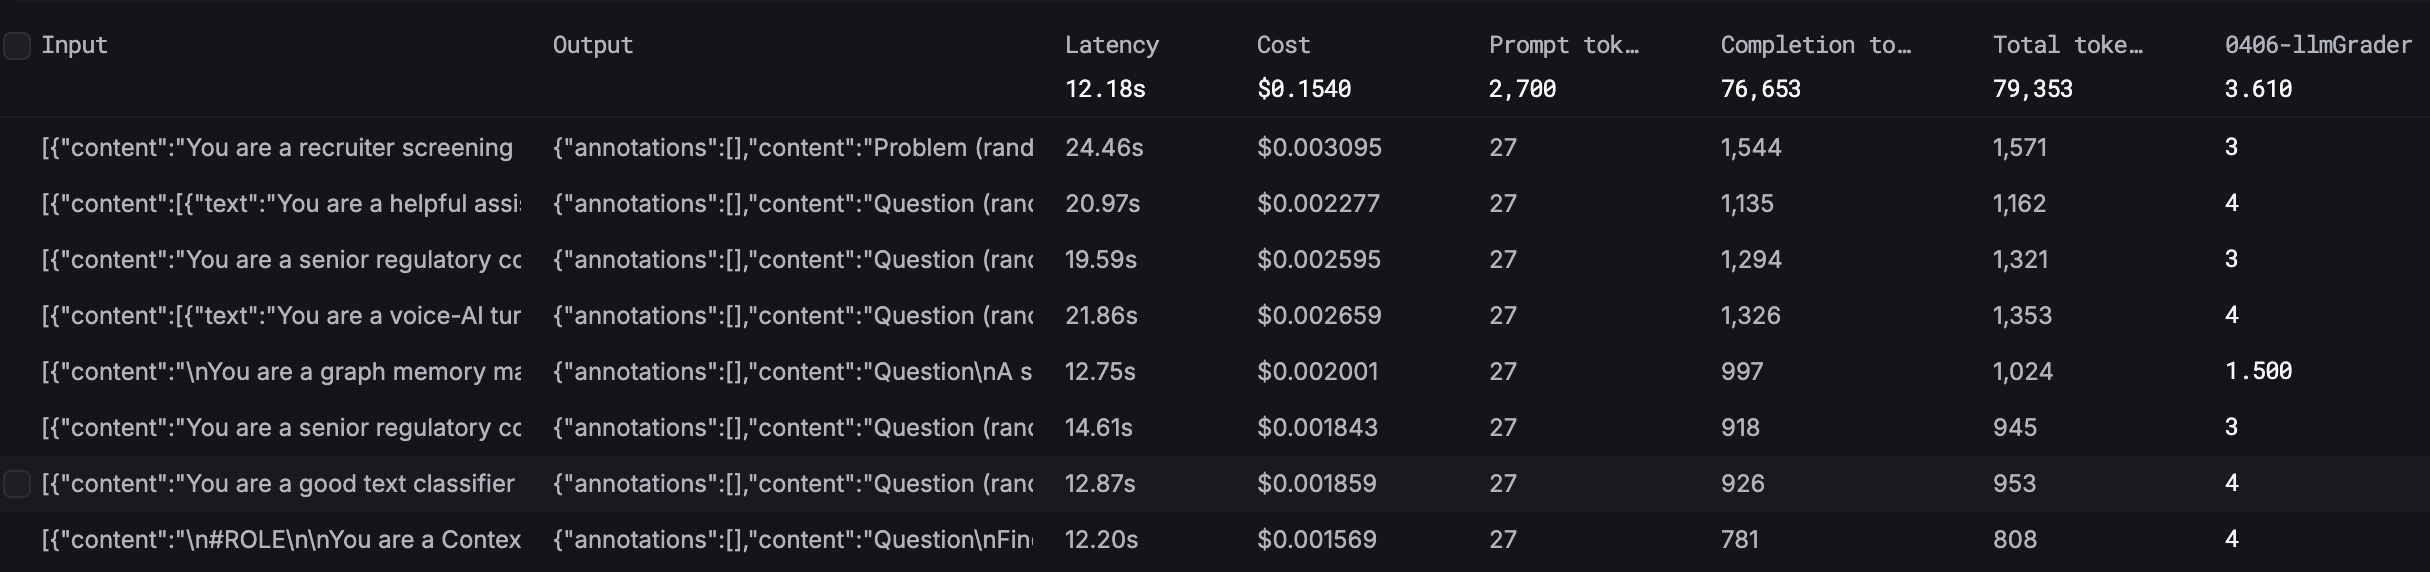
An experiment generates a new set of outputs by running every row in your dataset through your prompt, then runs your evaluator workflow over each output to produce scores, and aggregates the results so you can see how your prompt performs overall.
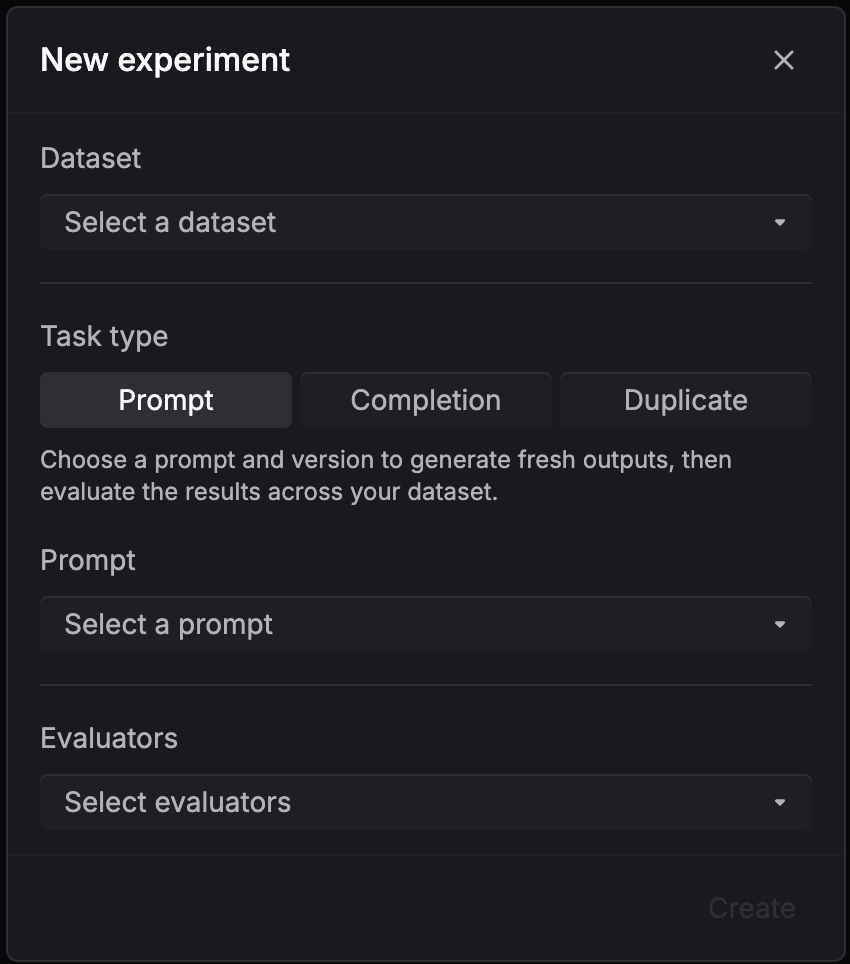
Go to Experiments and click + New experiment. Select your dataset, prompt, version, and evaluators.
Go back to your prompt, make changes (adjust the system message, add examples, change instructions), and commit a new version.
Create another experiment with the same dataset and evaluators, but select your new prompt version. Run it.
Open the Analytics tab in Experiments to compare evaluator score distributions across your experiments side by side.
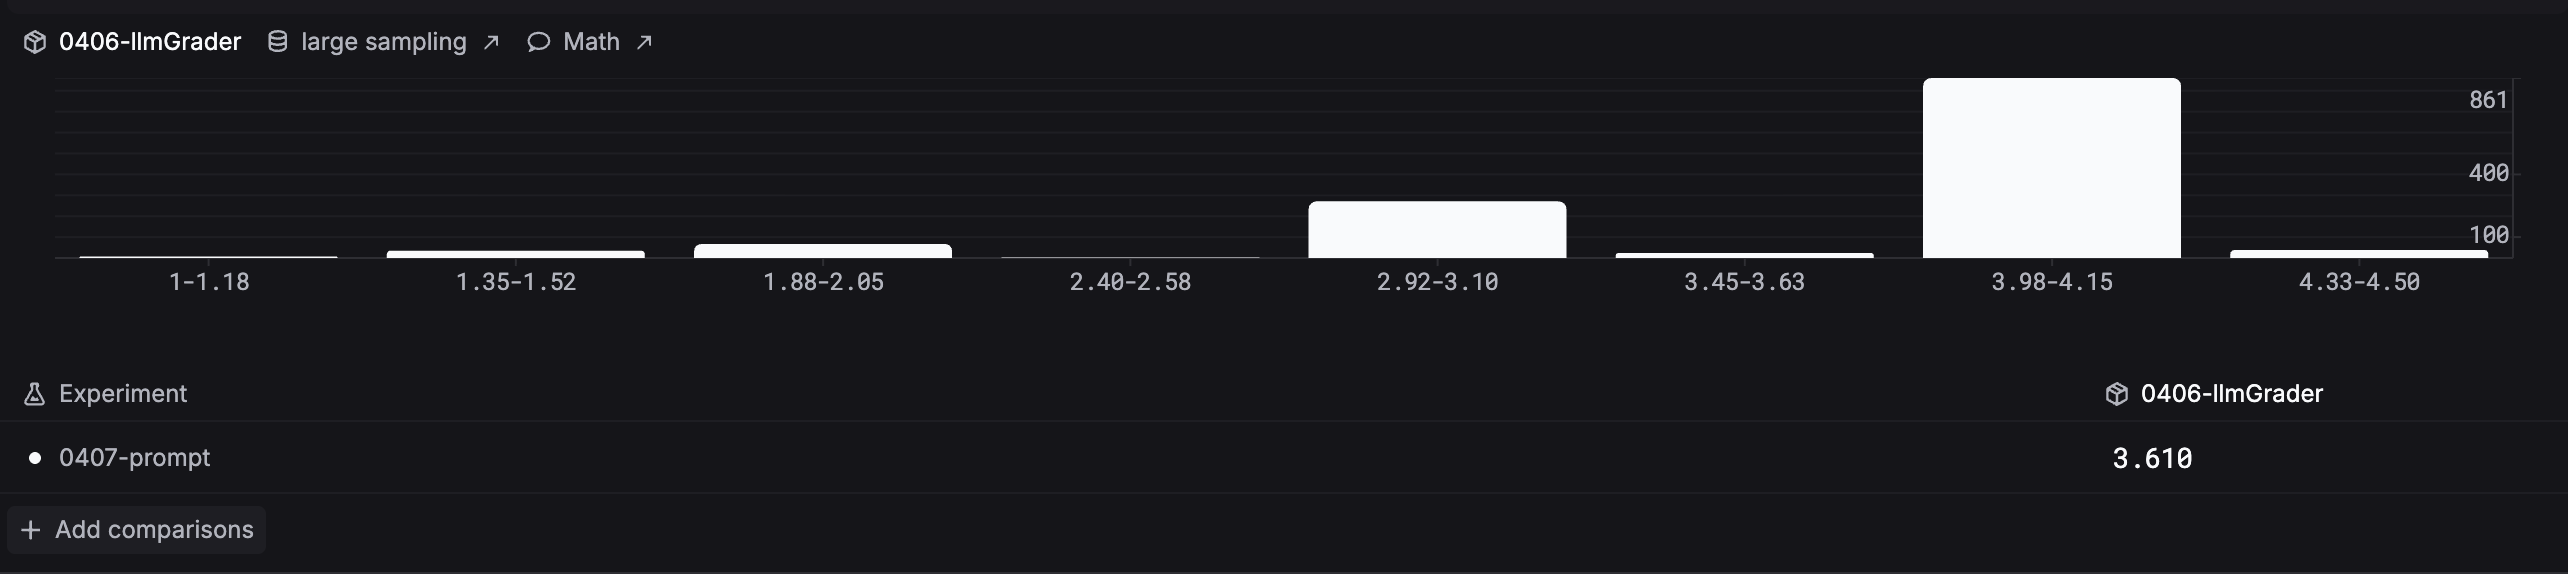
Pick the version that scores best and deploy it to production.
The eval loop continues as your product evolves: